Showing posts with label application. Show all posts

Monday, 25 August 2014

MAKING YOUR APP VISIBLE IN ANDROID GALLERY FOR SHARING

Hi all !!! when you see the Share Icon in Android Gallery it usually displays the application which has the capability to share a message , image, Video, or whatever data it is. How the gallery actually identifies the application which is capable of sharing.
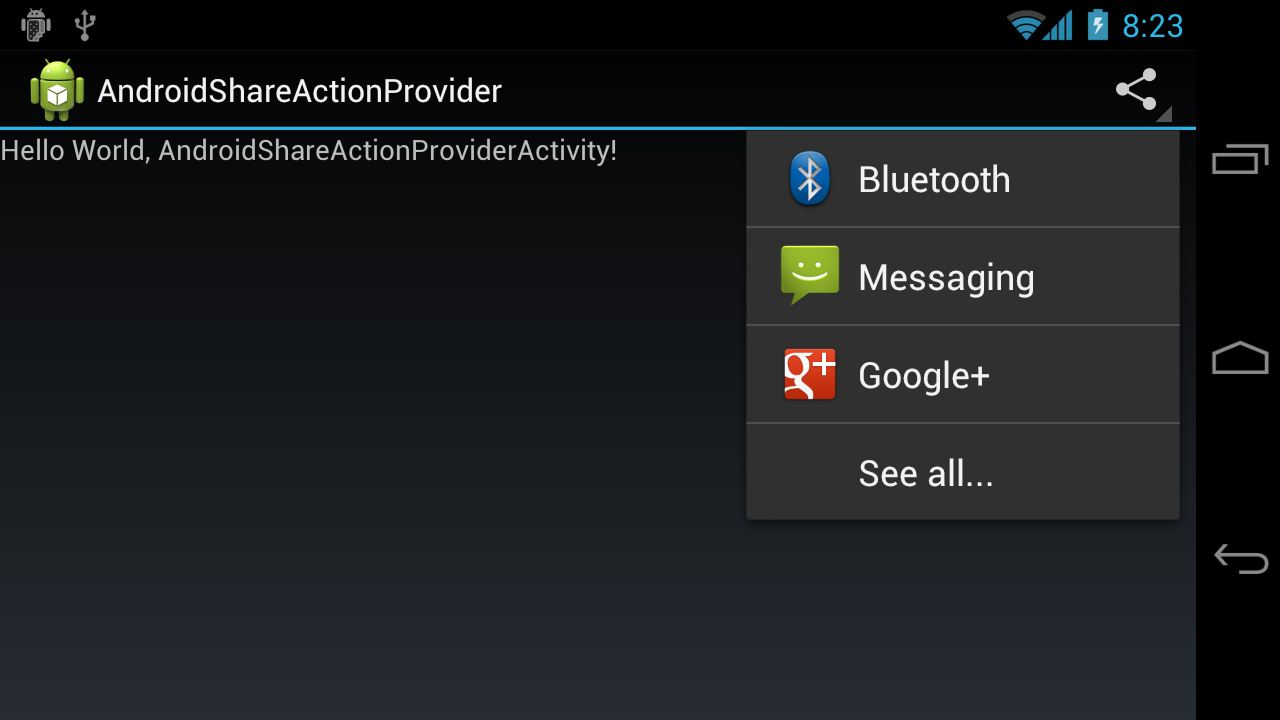


when you dig through the android source code for Gallery you will see a java file named ShareActionprovider.java this file has the tendency to update the menu in Action Bar in gallery which shows the Application.

what actually happens?
                       
                         Whenever the method public void setShareIntent(Intent shareIntent) in ShareActionProvider.java is invoked (the snippet is shown below)

    public void setShareIntent(Intent shareIntent) {
        ActivityChooserModel dataModel = ActivityChooserModel.get(mContext,
            mShareHistoryFileName);
        dataModel.setIntent(shareIntent);
    }


the ActivityChooserModel.setIntent will check for all the apps which is capable of sharing i.e it checks all the AndroidManifest.xml file of the Apps which has set share INTENT more precisely for this TAG,

                  android:name="android.intent.action.SEND" 

if this Action filter is present in the welcome Activity then this app will be shown in the gallery of your device. 


Author
G Hari Prasath
Project Engineer

Friday, 15 August 2014

ANDROID ARCHITECTURE


Hai every one!!! Where ever you refer for Android Architecture people use to explain the various stacks in android architecture as Google usually refers to the Android OS as a software stack. I am just showing what i have gathered from other websites which is clearly explaining how Android Architecture is. Each layer of the stack groups together several programs that support specific operating system functions. The image shown below is the architecture of Android.


THE KERNEL:

The base of the stack is the kernel. Google used the Linux version 2.6 OS to build Android's kernel, which includes Android's memory management programs, security settings, power management software and several hardware drivers. Drivers are programs that control hardware devices. For example, the Nexus One has a camera. The Android kernel includes a camera driver, which allows the user to send commands to the camera hardware.

LIBRARIES:

On top of Linux kernel there is a set of libraries including open-source Web browser engine WebKit, well known library libc, SQLite database which is a useful repository for storage and sharing of application data, libraries to play and record audio and video, SSL libraries responsible for Internet security etc.. You can think of libraries as a set of instructions that tell the device how to handle different kinds of data. For example, the media framework library supports playback and recording of various audio, video and picture formats. Other libraries include a three-dimensional acceleration library (for devices with accelerometers) and a Web browser library.

DALVIK VIRTUAL MACHINE / ANDROID RUN TIME:

Located on the same level as the libraries layer, the Android run time layer includes a set of core Java libraries. Android application programmers build their apps using the Java programming language. It also includes the Dalvik Virtual Machine. Google is now replacing Dalvik Virtual Machine With Android Run Time which introduces Ahead-Of-time compilation, which can improve app performance . ART also has tighter install -time verification than Dalvik.

NOTE : I will explain about the difference between Android Run Time and Dalvik virtual Machine in the next post.

A virtual machine is a software application that behaves as if it were an independent device with its own operating system. You can run a virtual machine on a computer that operates on a completely different OS than the physical machine's OS. The Android OS uses virtual machines to run each application as its own process. That's important for a few reasons. First, no application is dependent upon another. Second, if an application crashes, it shouldn't affect any other applications running on the device. Third, it simplifies memory management.

APPLICATION FRAMEWORK:

The next layer is the application framework. This includes the programs that manage the phone's basic functions like resource allocation, telephone applications, switching between processes or programs and keeping track of the phone's physical location. Application developers have full access to Android's application framework. This allows them to take advantage of Android's processing capabilities and support features when building an Android application. Think of the application framework as a set of basic tools with which a developer can build much more complex tools.The Application Framework layer provides many higher-level services to applications in the form of Java classes. Application developers are allowed to make use of these services in their applications

APPLICATION LAYER:

At the top of the stack are the applications themselves. This is where you find the basic functions of the device such as making phone calls, accessing the Web browser and accessing your contacts list. If you're an average user, this is the layer you'll use most. You do that with the user interface. Only Google programmers, application developers and hardware manufacturers access the other layers further down the stack. Moreover most of the people are playing over in this layer, coz it is the one which makes Android an ANDROID :P........

Author
HARI PRASATH G
PROJECT ENGINEER

Thursday, 24 July 2014

How to Capture “Friendly Name” from a Camera

Hi, Today am back with a mindblowing,method to tell you how you can capture or get a Friendly name of a camera.

What is a Friendly Name??
Any devices, will have some kind of ID for identification, some of them are
Device ID:
Vendor ID: etc...
Since all these are numbers, it is hard to be remembered by the user, so therefore a short name to recognize the type of camera , is called the friendly name.

Ex:USB 2.0

Things Required:
1.Visual Studio
2.Platform SDK
3.A Camera
So lets get started,into our journey of capturing Friendly names of a camera

STEP 1:
Install,the platform SDK,properly.You can have a look into my previous chapters where I would have discussed that.

STEP 2:
Open Visual Studio 2005, and then open a new Win32 Project,hope you are familiar with building Win32 Apps.For those who are not, dont worry, in a week or so I will post tutorials on win32 programming

STEP 3:
Just make a simple dialog box with an button,add a list box for viewing the enumerated Device. Just see the screen shot  below.
                                
STEP 4:
This is a crucial step as I am going do  a brief explanation of some of the concepts. I have commented my program ,to an extend where you can easily understand.

Here We are going to use a concept called COM(Component Object Model) which is a binary interface standard for software modules. It’s an interface between two program modules, one of them is an OS or a library.

System Device Enumerator
It returns a collection of device Monikers, selected by a device category.It enumerates Filters and hardware installed on the system.

Monikers
It contains information that uniquely identifies a component object model.
There is two important properties of it
1. Can be saved and later retrieved.
2. Support an operation called binding, which is a process of locating object named by a Moniker, activating and loading it, if it is not already active.

Iproperty Bag
This is a kind of variable ,or you can assume it as a bag as the name suggests, from which we can read the values. The Imonikers saves the object properties on it.
  Just see the program ,try building it and running it and then explore your own ideas with it.

If all step is  properly done then you can see an  window , as shown below


And here we come to the end of this tutorial ,hope you liked it.
Author
Vivek Gr
Embedded Project Engineeer


Thursday, 10 July 2014

Direct Show (AMCap) - Platform SDK with Visual Studio-2005 DirectShow/codenamed as Quartz:

Hi, Today I am going to tell you , on how to integrate platform SDK(DirectShow) to visual studio, for  development of multimedia processing Apps. So lets start, and roll

 Platform SDK  specializes in developing applications forWindows 2000, XP and Windows Server 2003 .

More on DirectShow will be discussed in a later posts. So for now just follow up the  steps and get started to work on Multimedia applications.Later in the same post, I will show you how to build your sample app called AMCAP, which is used to capture video from a camera


REQUIEMENTS
 Visual Studio 2005
 PlatFormSDK VER 6.0 installed in c:\Program Files

Don't worry if you have a higher versions, the same procedure should be followed.

STEP 1:
After installing the SDK to the specified Path,as mentioned above, just go to the following directory:

C:\Program Files\Microsoft SDKs\Windows\v6.1\Samples\Multimedia\DirectShow\BaseClasses


STEP 2:
 Right click and build the baseclass solution file, Dont worry you would get errors. Here we have to  include the library path in the properties window. Just see the screen shot I hope you will get an idea.


Add the required path in both c/c++ and Librarian

repeat same procedure for both debug and release mode


STEP 3:
Go to the following path and look for a folder call Amcap

C:\Program Files\Microsoft SDKs\Windows\v6.1\Samples\Multimedia\DirectShow\Capture\AMCap

Build the solution file and you will get Error. First thing which you need to do is  run Visual studio as administrator and then try building this.

STEP 4:
Repeat the step 2, to include lib paths ,just see the screen shots and understand!
Note: already some directories may be included , so don't alter that, just give the required path ,separated by a comma.

For Debug version-make sure that Strmbasd.lib is present in the \Baseclass\Debug Folder

For Release version its Strmbase.lib, path \Baseclass\Release


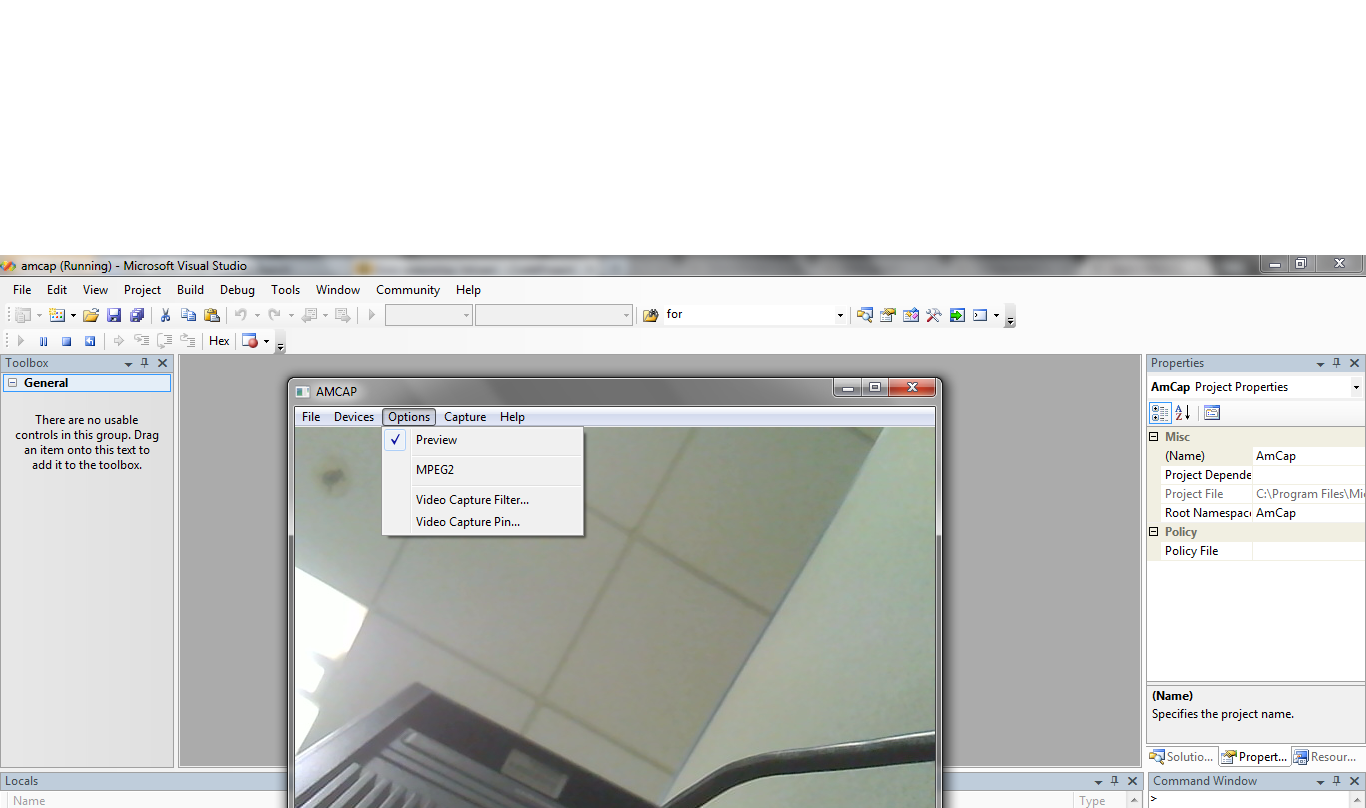
 Now Try building the solution file and you will get an window if you have followed correctly the above mentioned steps


Now, Connect your Camera and just click the preview button from the menu bar and Voila!!!!, you will get a window with live streaming


                                                                                Author
                                                                               Vivek Gr
                                                                      Embedded Project Engineer